
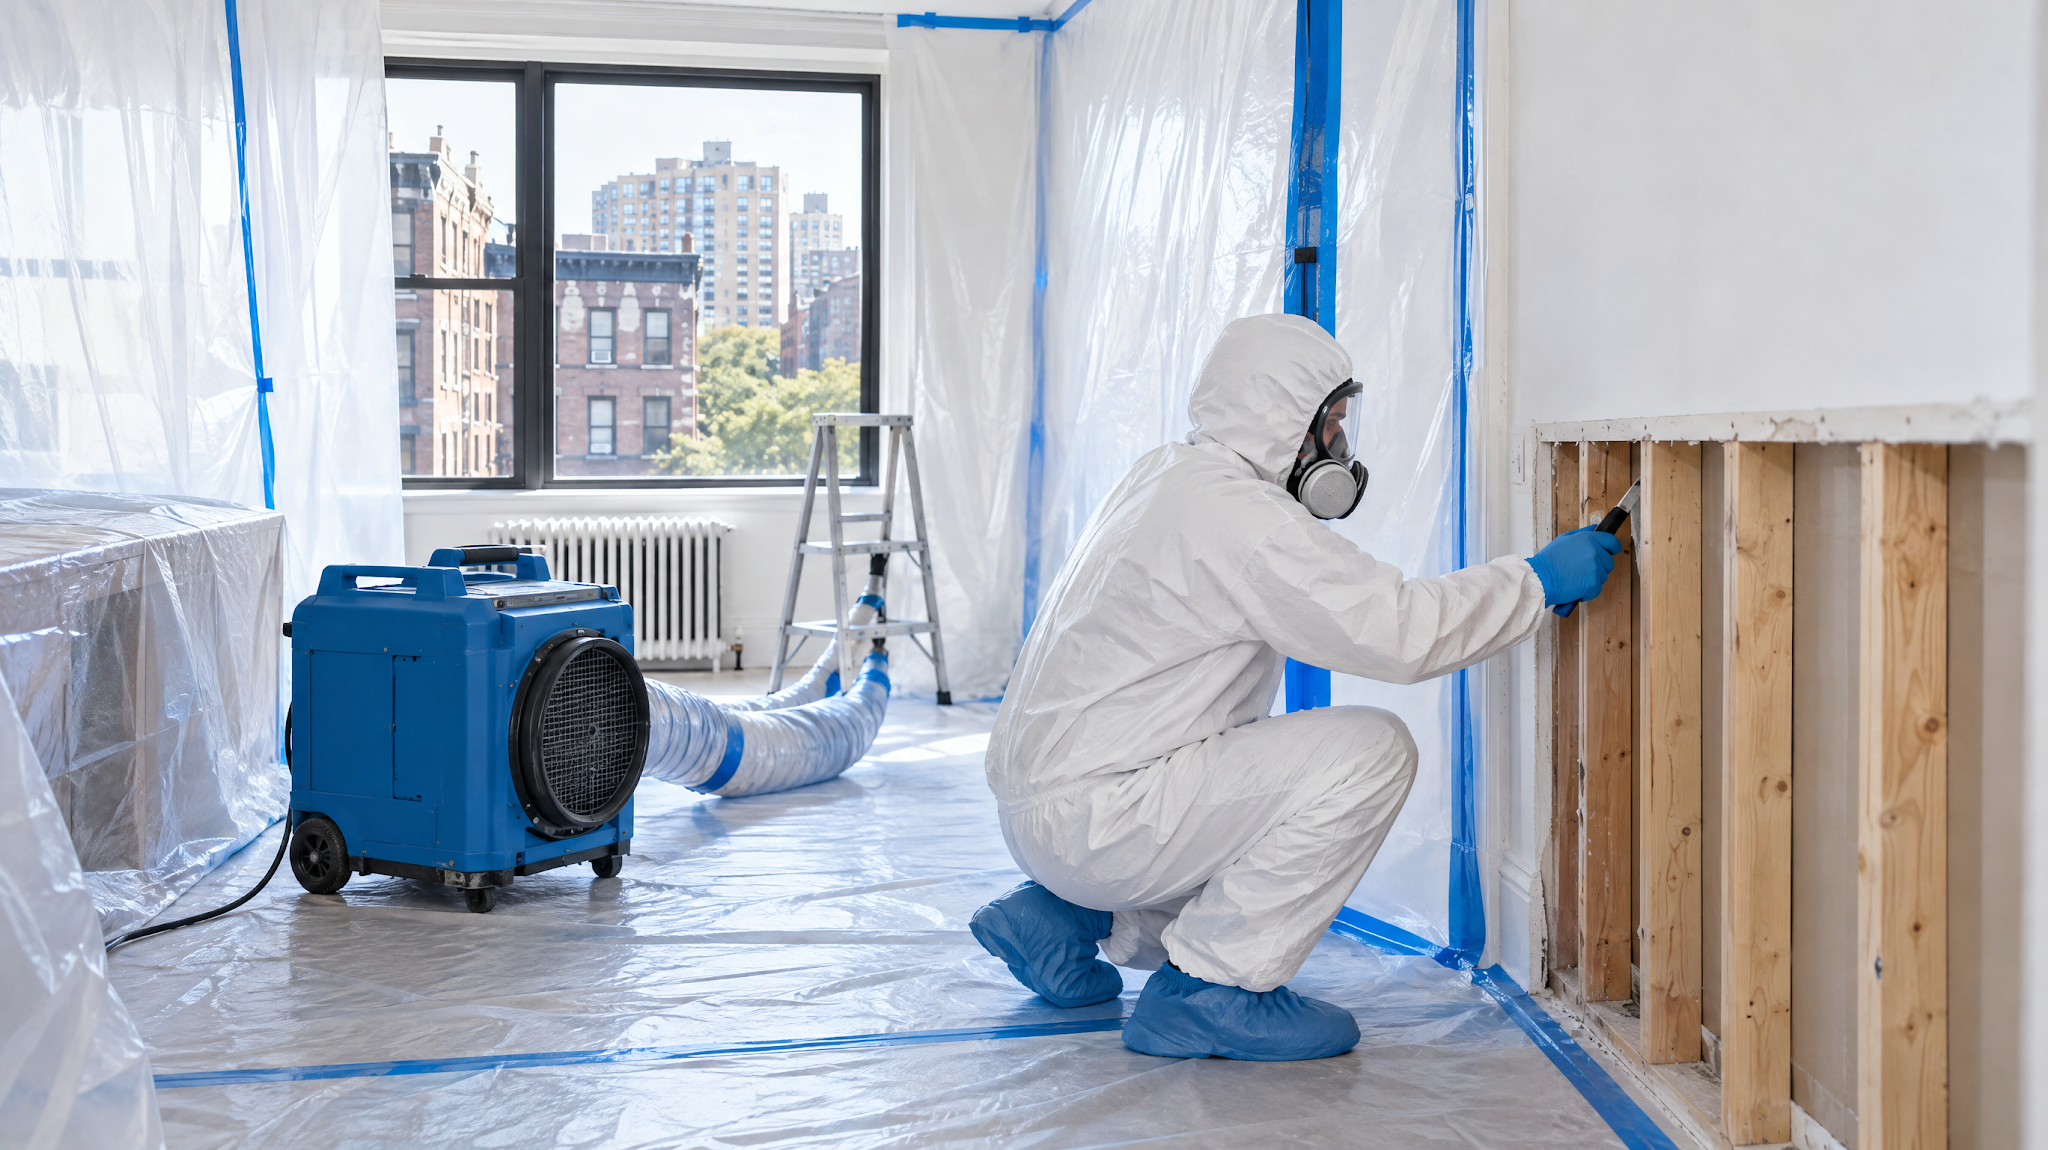
In New York, when you hire professionals to remove mold that covers more than 10 square feet, state law splits the job between two licensed companies. You hire an independent mold assessor, who inspects your home and writes a plan for the work. You hire a remediation contractor separately, and the contractor follows that plan to remove the mold. Then the assessor comes back to check the finished work, and the job isn’t done until it passes.
The job goes in this order:
| Step | Who does it | What you do |
|---|---|---|
| First, if water is still coming in: stop the leak | A plumber | Call one before anything else |
| 1. Inspect your home and write the remediation plan | The mold assessor | Hire the assessor and read the plan |
| 2. Write the work plan, which says how the job will be done | The remediation contractor | Hire the contractor and get the work plan before work starts |
| 3. Fix the moisture problem behind the mold | A plumber, roofer or other trade, depending on the cause | Make sure the repair gets done |
| 4. Get your home ready | You | Move belongings out of the work area and decide where you’ll stay |
| 5. Seal off the work area with plastic sheeting (containment) | The remediation contractor | Stay out of the work area |
| 6. Remove mold-damaged materials and clean | The remediation contractor | Stay out of the work area |
| 7. Check the finished work (clearance) | The mold assessor | Get the written report saying the job passed |
| 8. Take down the containment and hand over the paperwork | The contractor and the assessor | Keep the paperwork and arrange any rebuilding |
The state rules behind these steps apply when the mold covers more than 10 square feet. Our guide to New York State mold laws explains who they cover. For a smaller area, the state Department of Labor says you may be able to remove the mold yourself if you aren’t sensitive to mold.
We’re Dry Ease Mold Removal, the remediation contractor in this process. We hold a New York State mold remediation license and work alongside independent licensed assessors. Rob Gershman, our owner, has over 20 years of experience in mold remediation and water damage restoration in New York City.
How long does the mold remediation process take?
How long mold remediation takes depends mostly on how much mold there is. The assessor’s plan for your job includes an estimate of how long the remediation will take. That estimate covers the remediation itself. The steps around it take time too: the assessor’s first visit, hiring a contractor, usually two business days’ notice to the city in a building with 10 or more apartments, and the clearance visit at the end. Our article on how long mold remediation takes goes into more detail.
Step 1: A mold assessor inspects your home and writes the remediation plan
You hire and pay the assessor yourself, separately from the remediation contractor. The assessor comes to your home and looks at the mold and the damage around it. The inspection may include checking the building materials with a moisture meter. From that visit, the assessor writes the mold remediation plan, the document the rest of the job follows.
Should you call a mold assessor or a remediation company first?
Call us first if you can see the mold and want to know what removing it involves. We’ll come out, look at the mold, look for where the moisture is coming from, and give you a free estimate. When the mold is visible, we don’t need an inspection to price it.
Start with the assessor if you aren’t sure it’s mold. Whichever call you make first, hiring follows the order the New York State Department of Labor sets: you must first have an assessor inspect your home and write the plan, and then you hire the remediation contractor. The plan gives each contractor you’re considering the information they need to give you a cost estimate.
Why the assessor and the remediation company have to be different companies
“The same company cannot do the inspection and the remediation at the same time,” Rob says. “It’s a conflict of interest.”
The rule itself is in Article 32 of the New York Labor Law: no licensee can do both the assessment and the remediation on the same property. It means the company being paid to remove the mold doesn’t get to decide how much mold there is, how much has to come out, or whether its own work passed. Those decisions belong to a licensed assessor who isn’t being paid for the removal.
If a remediation company offers to test its own work or tell you the job passed, treat that as a warning sign. Our article on mold testing vs. mold remediation explains how the two roles divide.
What’s in the mold remediation plan
The assessor gives you the plan before any work begins. Read it when it arrives, because it describes your whole job. According to the Department of Labor, the plan covers:
- the rooms or areas where the work will happen
- an estimate of how much material will be cleaned or removed
- the methods for each area
- containment, when it’s needed, to keep mold from spreading
- the protective gear recommended for the remediation technicians, which the contractor provides
- how the finished work will be checked, and the standards it has to meet to pass (called the clearance criteria)
- for a home or building where people live, recommendations for telling the occupants and posting notices
- an estimate of the cost and how long the job will take
- any disinfectant or antimicrobial product being considered
- the source of the moisture behind the mold, when the assessor can find it, and the kind of contractor who can fix it
Step 2: You hire a remediation contractor and get a work plan
With the plan in hand, you choose a licensed remediation contractor, and the contractor prices the work from the plan. When you call us about a complex job, Rob handles the estimate himself. Before you hire anyone, check their state license. Our guide to hiring a licensed NYC mold remediation contractor shows you how.
Once you’ve hired a contractor, it writes a mold remediation work plan for your job. The assessor’s plan says what has to be done. The work plan gives the contractor’s instructions and procedures for doing it, and it may also cover how the containment will be built and what equipment will be used. You should get the work plan before any work starts in your home.
In a building with 10 or more apartments, the contractor also has to file a notice with the city’s Department of Environmental Protection (DEP) before starting. The contractor handles the filing. For you, it usually means the work can’t begin until at least two business days after the notice goes in.
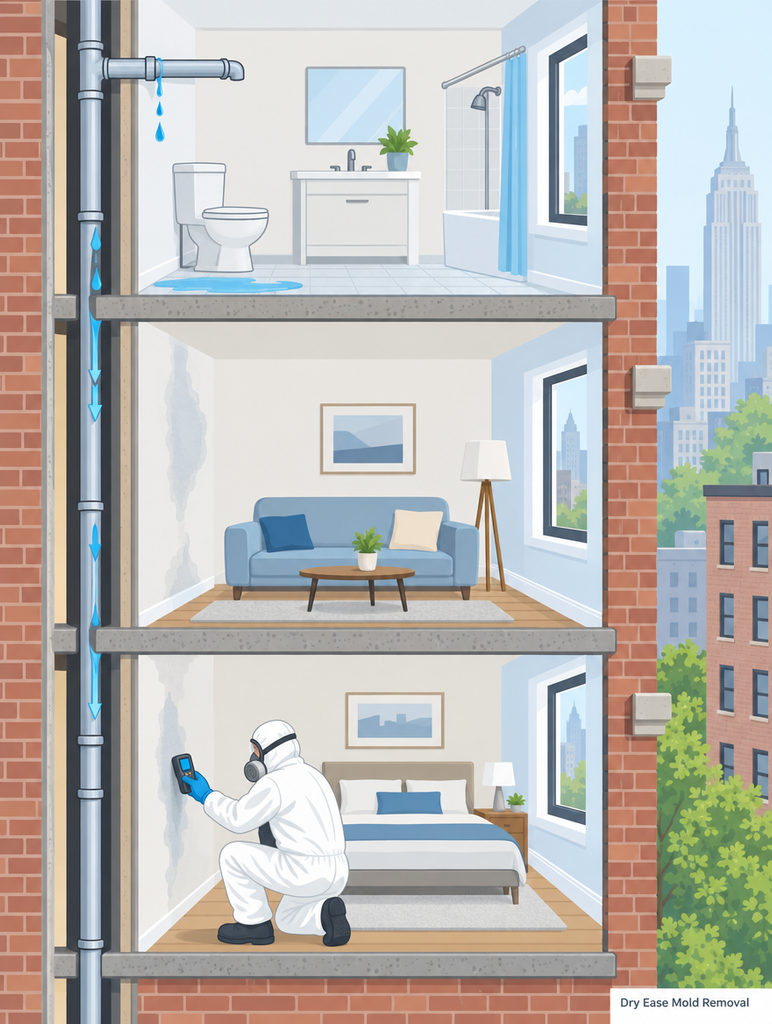
Step 3: The leak or moisture problem gets fixed
The assessor’s plan names the moisture source behind the mold, when it can be found, and the type of contractor who should fix it. That repair comes before the remediation work. The Department of Labor says it is “always recommended to correct the underlying source of water/moisture before cleaning up mold growth or the mold will likely grow back.”
The remediation contractor isn’t always the one who makes that repair. A leaking pipe needs a plumber, and a leak through a roof or an outside wall needs a contractor who works on those. In a building with three or more apartments, HPD’s rules make the owner responsible for fixing the cause of the mold as well as removing the mold itself.
Finding the source is a big part of how we work, because in city buildings it often isn’t obvious. “When you have a flood or a leak, it hits multiple units and it’s old building material,” Rob says. “So a lot of times it’s hard to figure out the source.” The cause isn’t always a leak, either. In older buildings it can be poor ventilation, humidity that keeps a room damp, old insulation or old plumbing. We help the homeowner, the landlord and the tenant work out which one it is, instead of removing the mold we can see and leaving the cause in place.
Step 4: Get your home ready
Before the work starts, you need to clear your belongings out of the work area, and you need to decide where you’ll be while the work goes on.
What happens to your furniture, clothes and other belongings
Move everything you can out of the work area before the job starts: furniture, clothes, rugs, electronics, boxes. The NYC Health Department’s mold guidelines say items that are hard to clean, such as carpeting and electronics, should be taken out of the work area or covered before the work begins. On larger jobs, the guidelines call for anything left in the work area to be covered with plastic sheeting sealed with tape.
Some belongings that already have mold on them can be cleaned. Porous things that have absorbed mold, such as carpet, may have to be thrown away. For valuable items that have been damaged, NYC Health recommends a professional restoration consultant. Point out anything you care about before the work starts, so you’re part of the decision about whether it’s cleaned, restored or thrown away.
Do you have to leave your home during mold remediation?
Plan to stay out of the work area while the remediation is going on. NYC Health’s guidelines say, “The work area should be unoccupied.” Whether you need to leave the whole home depends on how much mold there is and where it is. When the mold is in one room, staying out of that room may be enough. For large areas of mold, the EPA’s guide for schools and commercial buildings notes that the plan may include moving some or all of the occupants out for a while.
When callers ask Rob, he tells them what he would do in their place. “I can’t legally tell them to not be there,” he says. “But I tell them that if it was my baby, I wouldn’t have my baby here, you know?” Our article on staying in your apartment during mold remediation goes further into who should leave and when.
Step 5: Containment goes up
Containment is the barrier that keeps mold and dust inside the work area. Cutting out moldy drywall or pulling up flooring stirs up dust and mold spores, and without a barrier that dust can travel into the rest of your home.
How much containment you see depends on the size of the job. For a small area, it may be little more than plastic over the floor and nearby belongings. For a larger one, the work area is closed off completely. Once it’s up, expect to see some or all of these:
- Signs at the entrances to the work area saying a mold remediation project is in progress. The law requires them at every accessible entrance.
- Plastic sheeting sealed with tape, closing off the work area, with a sealed entry point for getting in and out.
- Sealed vents. Vents and other openings in the room are covered with plastic. If your heating or air conditioning serves that room, it may have to be shut off while the vents are sealed.
- A HEPA air scrubber, when the plan calls for one. This machine pulls air out of the work area through a HEPA filter, a very fine filter that traps dust and mold spores. Pulling the air out keeps the air pressure inside the containment a little lower than in the rest of your home. Air then flows into the work area instead of out of it.
- Licensed technicians in respirators and protective clothing.
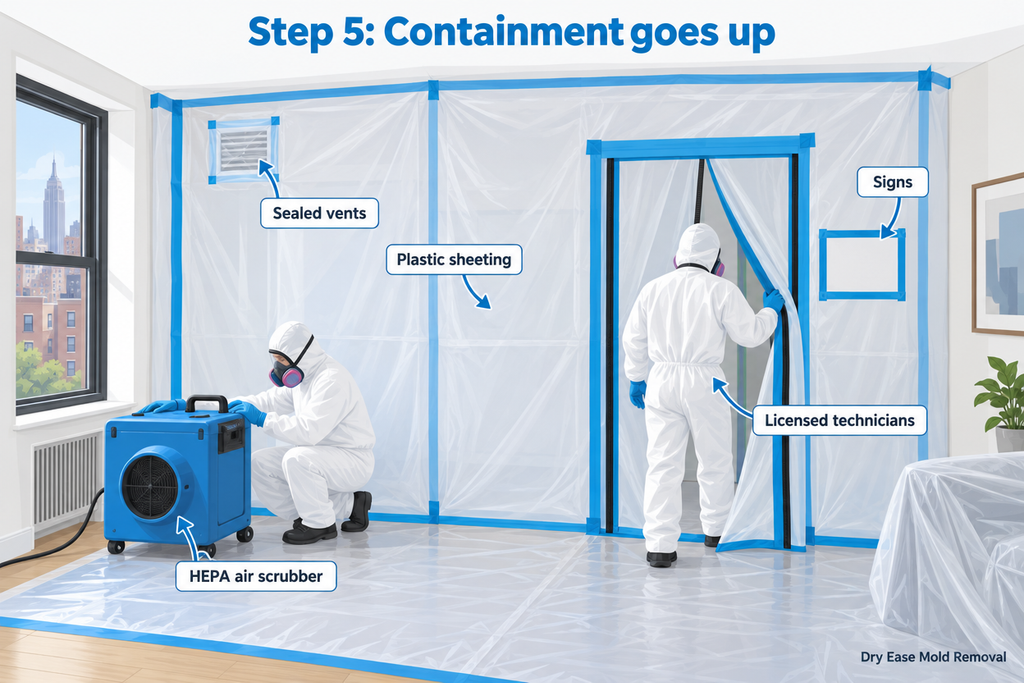
By law, the containment has to stay up until the job passes clearance in step 7. If the plastic comes down before then, the work isn’t being done properly.
Step 6: Mold-damaged materials are removed and the area is cleaned
With the containment in place, the removal starts. Our licensed technicians follow ANSI/IICRC S520, the industry standard for professional mold remediation, along with EPA guidelines and NYC Health’s guidelines. The assessor’s plan sets out which materials come out and which get cleaned. NYC Health’s guidelines sort them like this:
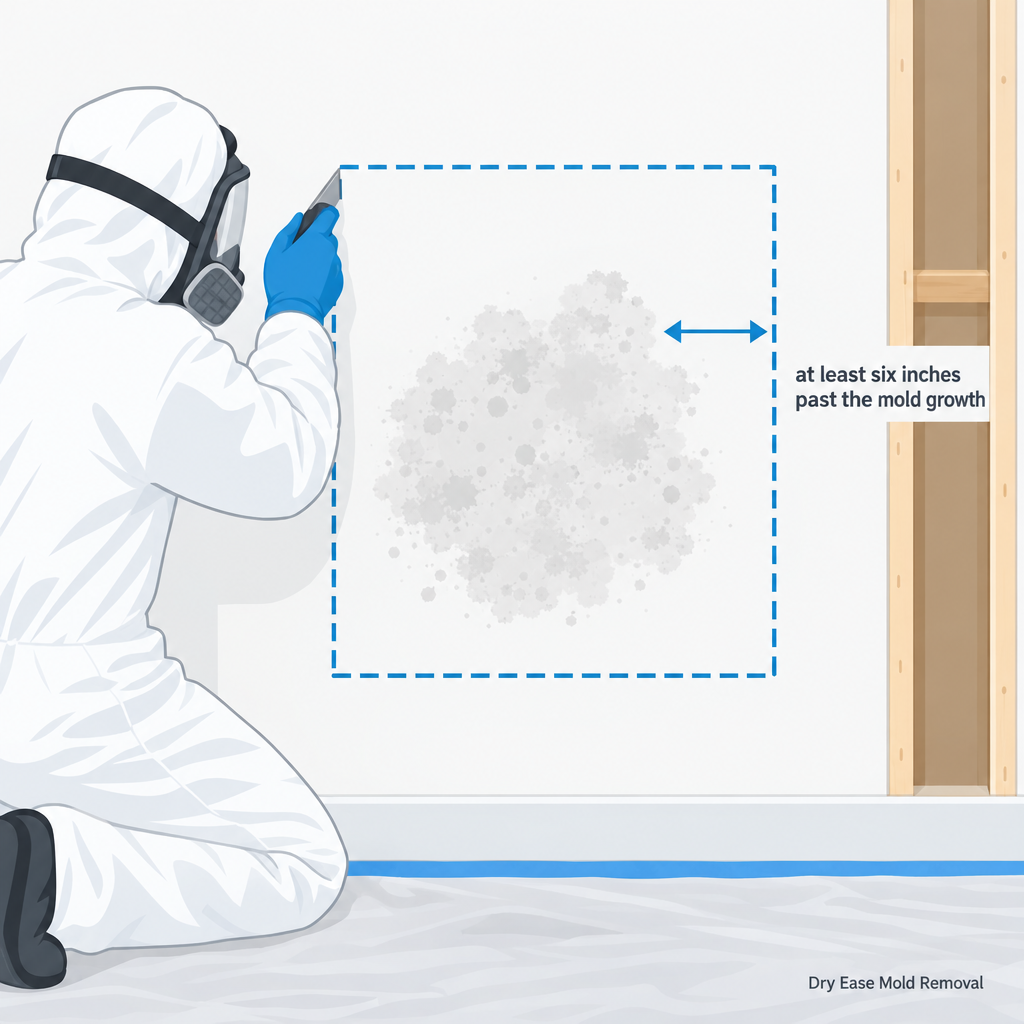
Removed and thrown away
- insulation and ceiling tiles with mold growing on them
- drywall with more than a small area of mold, taken out to at least six inches past the mold growth (including hidden areas) or the wet area
Cleaned and left in place
- wood and concrete that are still structurally sound
- the other surfaces in the work area that aren’t removed, which are HEPA vacuumed and then wiped down
- the route from the work area out of your home, cleaned the same way
The guidelines also call for keeping dust down during the work, for example by misting materials with a dilute soap solution or using tools fitted with HEPA vacuum attachments. Moldy materials go out in sealed heavy-duty plastic bags, and on large jobs the guidelines call for cleaning the outside of the bags before they’re moved.
Spraying a disinfectant isn’t a required step. NYC Health’s guidelines say disinfectants “are seldom needed to perform an effective remediation.” Removing the damaged materials and cleaning the surfaces are what get rid of the mold.
When the technicians are done, the area should be what NYC Health’s guidelines describe: “dry and visibly free from mold, dust, and debris.”
Step 7: Post-remediation clearance by the assessor
When the work is done, the assessor comes back to inspect it. This visit is the post-remediation assessment, and a job that passes it has reached clearance. We don’t do this check on our own jobs. The Department of Labor recommends using the same assessor who wrote your plan, though it isn’t required.
At this visit, the assessor checks that:
- the work area is free from all visible mold
- the work followed the remediation plan and the work plan
- the job meets the clearance criteria in your plan
- as far as the assessor can tell, the cause of the mold has been fixed (if it hasn’t, the assessor recommends the type of contractor who can fix it)
If the job passes, the assessor gives you a written report saying so, called a passed clearance report. That report means the job is finished. In a building with 10 or more apartments, the assessor also files the result with DEP.
Is mold clearance an air test?
Clearance is usually not an air test. You may be expecting air samples sent to a lab, but the Department of Labor says mold sampling is rarely recommended. There is always some mold in the air and on surfaces, so a sample will almost always find some. There are also no national or state standards to compare the results against. The assessor checks the job against the clearance criteria in your plan. If those criteria include sampling, the assessor follows them.
What happens if the job fails clearance
If the job doesn’t pass, the assessor writes a final status report and gives it to both you and the contractor. The report says what still has to be done to pass. Depending on what’s wrong, the assessor may recommend finishing the work in the original plan, fixing the underlying cause of the mold, or doing a new assessment. The containment stays up while that work is done, and the assessor checks the job again afterward.
Step 8: The containment comes down and you get your paperwork
Once you have the passed clearance report, the containment can come down. Putting back any walls, ceilings or floors that were opened up is a separate job that comes after that. Ask who will do it before the remediation starts.
Keep the paperwork from the job together. It’s your proof of what was done if you sell, file an insurance claim, or need to show a tenant, your building’s board or HPD. You should have:
- the assessor’s remediation plan
- the contractor’s work plan
- the passed clearance report
- the contractor’s post-remediation report. Ours documents the remediation work we did. It’s separate from the assessor’s clearance report, which is the one that says whether the job passed.
- in a building with 10 or more apartments, the receipts for the DEP filings from the contractor and the assessor
If HPD has issued a Class B or C mold violation (10 square feet or more of mold in a room) in a building with 10 or more apartments, the owner also needs these for HPD:
- a Certificate of Correction
- an Affidavit of Remediation, from the remediation contractor
- an Affidavit of Assessment, from the assessor
- a copy of the assessor’s license
- a copy of the remediation license, or of the Mold Remediation Supervisor License
If you have an HPD mold violation
HPD gives a building owner a set number of days to correct a mold violation, counted from the date the violation is served. For mold in a room inside an apartment, the deadline depends on how much mold there is:
| Violation class | Mold in a room inside an apartment | Time to correct |
|---|---|---|
| Class A | Less than 10 square feet | 90 days |
| Class B | 10 to 29 square feet | 30 days |
| Class C | 30 square feet or more | 21 days |
Mold in hallways and other common areas is classed by different measures.
“We do the remediation and the assessor comes back and clears the violation,” Rob says. After the assessor has passed the job, the owner, the managing agent or an officer of the corporation that owns the building certifies to HPD that the violation has been corrected. Our page on HPD mold violation removal covers the rest of the process.
Can mold come back after remediation?
Mold can come back after remediation if the moisture that caused it is still there. We won’t promise it never returns, because that depends on the moisture source. The repair that stops the moisture may be a job for a plumber, a roofer or the building rather than for the remediation contractor, as step 3 explains. We run dehumidifiers during the work, check moisture levels after the job, and give you recommendations to help prevent the mold from coming back.
Getting an estimate for your mold remediation
If you have mold in your home or building and want to know what your job would involve, call us at (877) 215-8399 or send us a message. The estimate is free, and if you already have an assessor’s plan, we’ll price the work from it. You can read more about how we work on our mold removal services page.